
Flooring Investment vs. Expense: Why Professional Installation Saves Thousands

Professional flooring installation in Tampa Bay is priced to cover material, installation, and the engineering steps that determine whether a floor lasts 3 years or 25. The difference is preparation: moisture testing, planimetry leveling, vapor barriers, calibrated expansion gaps, and documented staggering patterns. In Florida’s climate, these are minimum conditions, not upgrades.
The Hidden “Double Cost” of DIY Failures
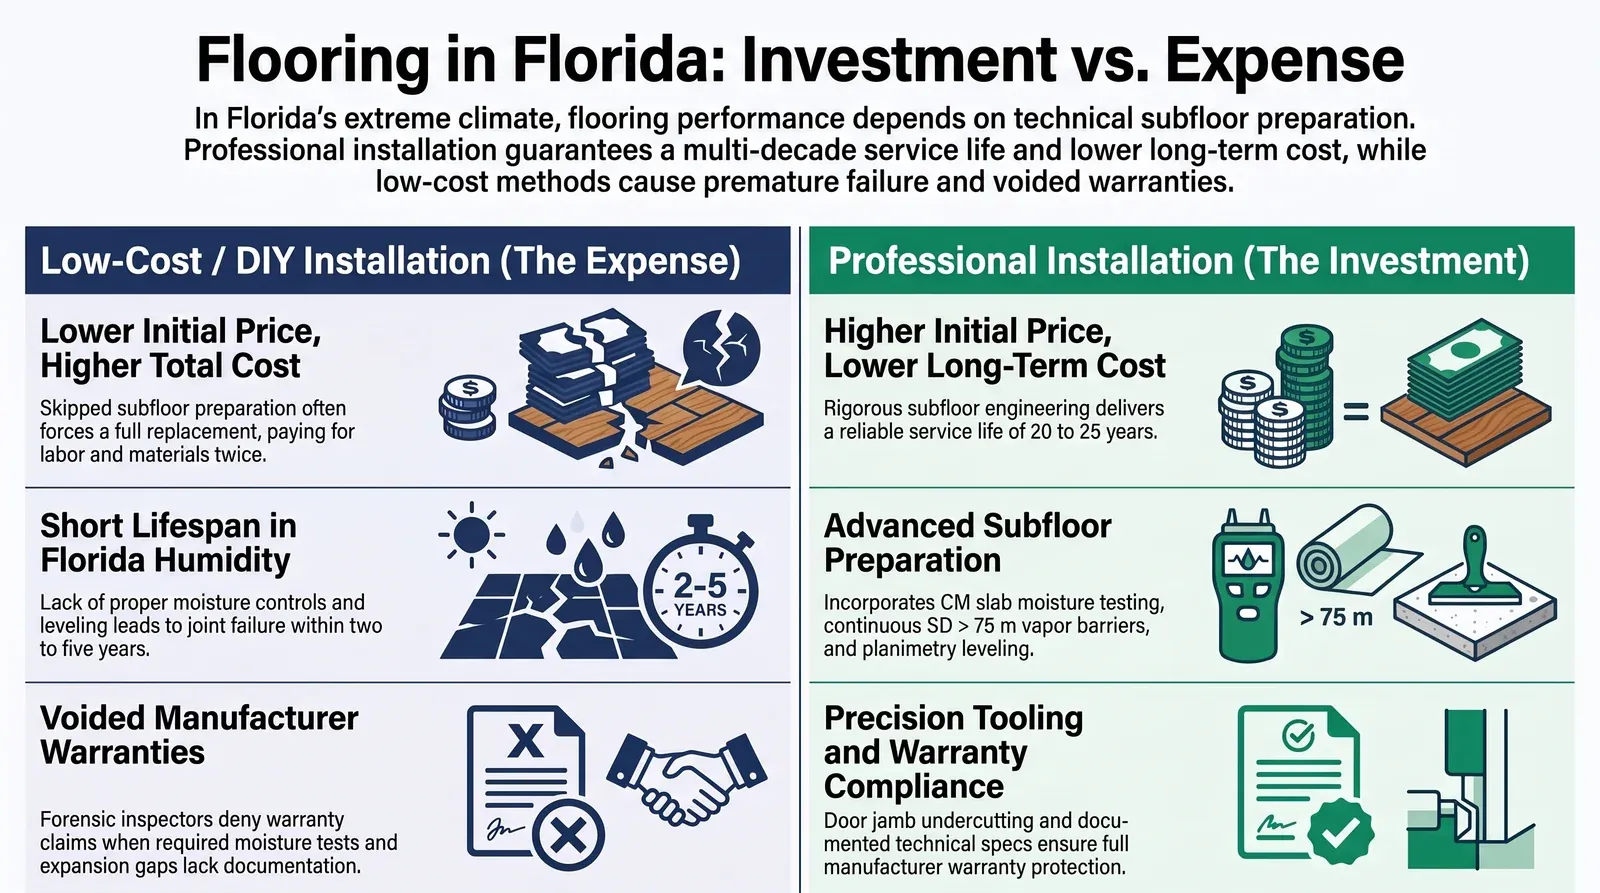
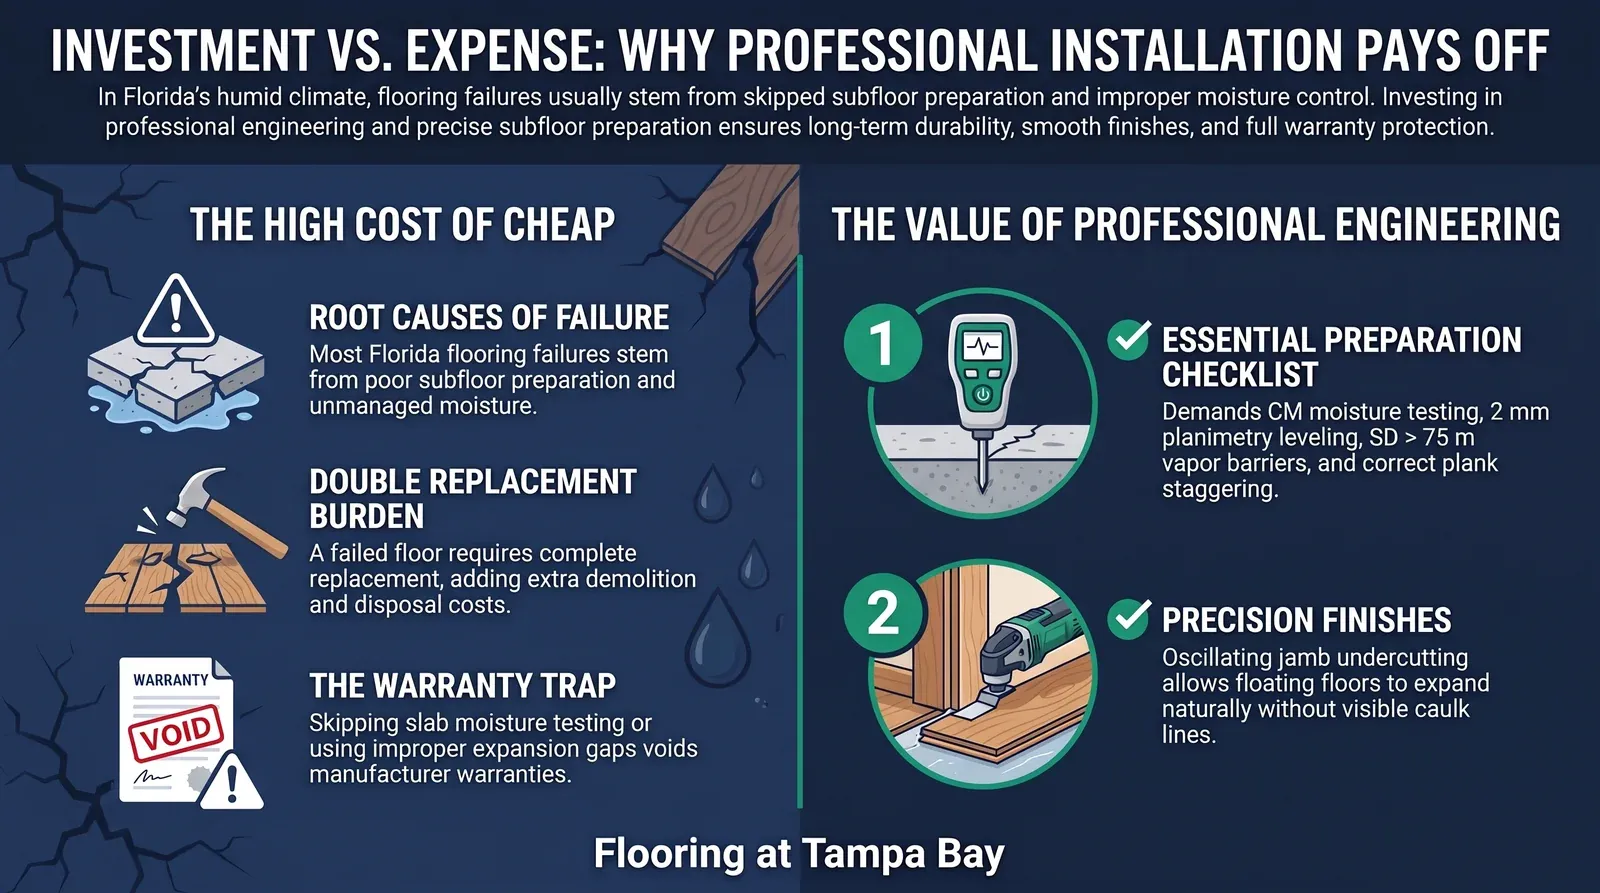
Self-installation or uncertified labor that skips subfloor preparation does not fail gracefully. When the floor fails, both labor and material are lost, and the replacement starts from zero.
Replacing a ruined 1,500 sq ft floor costs the original installation price again, plus demolition and disposal of the failed material on top. A floor that has to be installed twice within a few years always costs more in total than one installed correctly the first time, even though the first quote looked cheaper.
Engineering for the Florida Microclimate
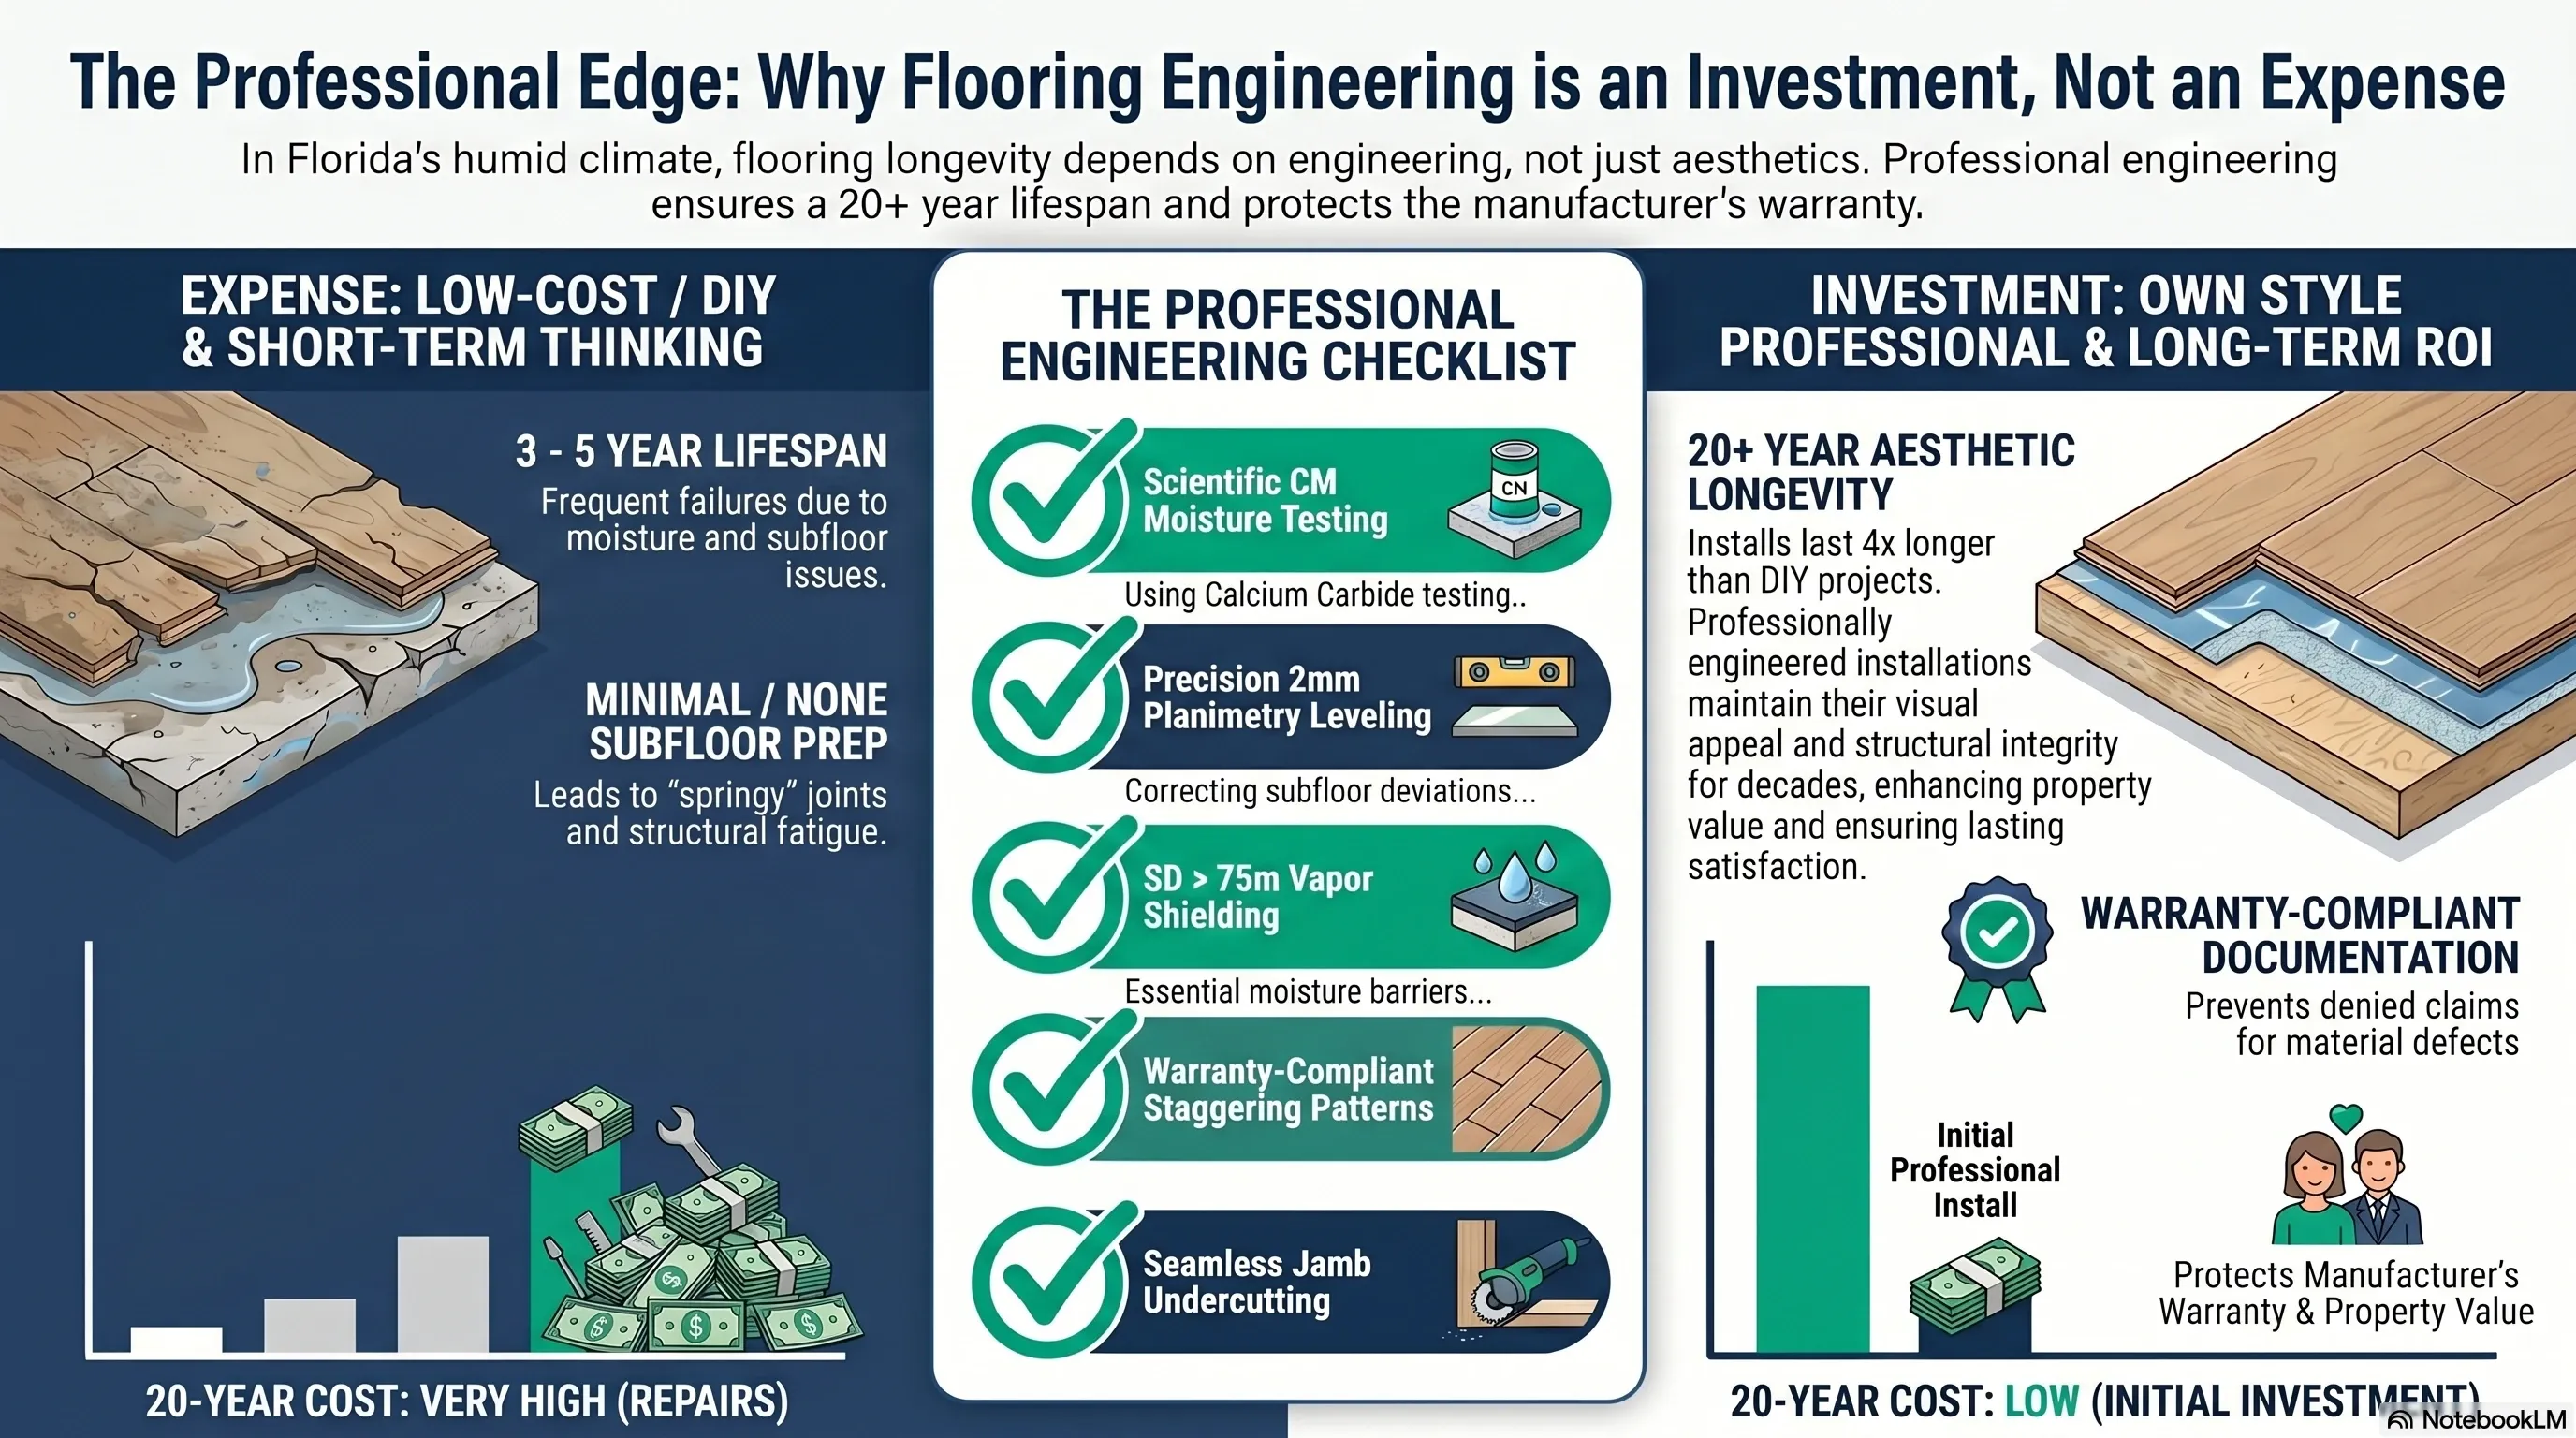
Florida is one of the most challenging environments in the world for wood-based flooring products. In Brandon, Riverview, and across Hillsborough County, the combination of slab-on-grade construction and intense AC cycling creates constant mechanical stress on laminate planks. A professional installation includes Calcium Carbide (CM) moisture tests, SD > 75 m vapor barriers, and precisely calculated expansion gaps. These technical steps — routinely skipped in low-cost installs — are the only reason a floor stays flat during a humid August.
The Warranty Trap — Why “Correct” Matters
Every major laminate manufacturer maintains a multi-page list of installation requirements. Without proof that the slab was tested for moisture or that the underlayment met the EPLF 60 kPa compressive strength standard, the warranty is effectively void. If a material defect occurs, the manufacturer sends a forensic inspector. A missing 10 mm expansion gap means a denied claim. Professional installation provides the documented technical compliance needed to stay protected.
How Does a Manufacturer Actually Deny a Warranty Claim?
A forensic inspector, not the homeowner’s memory of the installation, decides whether a claim is honored. When a plank warps or a joint separates within the warranty period, the manufacturer sends an inspector to examine the failure and the surrounding installation conditions — expansion gap width, underlayment specifications, and often a core sample to check for moisture damage.
If the gap measures under the required 10 mm, or the underlayment’s compressive strength cannot be verified, the inspector’s report attributes the failure to installation error, and the claim is denied regardless of whether the plank itself had a genuine manufacturing defect.
A forensic inspection typically checks:
- Expansion gap width at the perimeter, measured against the manufacturer’s 10 mm minimum
- Underlayment compressive strength documentation, not just the product name on the box
- A core sample from near the failure point, tested for moisture content
- Dated photos or records showing the slab passed a moisture test before installation
Photo documentation from the original installation — gap spacers in place, underlayment specification sheets, a dated moisture reading — is what allows a legitimate claim to proceed instead of being closed on the spot.
What Do Homeowners Actually See When Preparation Is Skipped?
The symptoms follow a predictable order because they trace back to the same missing steps. Peaking joints appear first, usually within the first full season change, when a missing expansion gap runs out of room as the planks absorb humidity.
Hollow or bouncy spots underfoot follow, tracing back to a subfloor that was never leveled to within tolerance. Musty odor or visible staining near baseboards, when it appears, points to a vapor barrier that was missing or left unsealed at the seams. Each of these is a distinct, traceable failure mode — not random bad luck — and each one maps directly to a preparation step that either happened or did not.
Is There a Middle Ground Between Full DIY and Full Professional Installation?
Yes, and it is a common way homeowners reduce cost without cutting the steps that determine whether the floor survives. Demolition — removing old flooring and disposing of it — is straightforward physical labor that does not require specialized engineering knowledge, and many homeowners handle it themselves before a crew arrives.
The steps that should not be split off to DIY labor are the ones a forensic inspector checks first: moisture testing, subfloor leveling, vapor barrier installation, and expansion gap calibration. Splitting the job this way keeps the cost savings from demo labor while preserving the documented technical compliance a warranty claim depends on.
Specialized Tooling and Precision Finishes
The difference between an “expense” and an “investment” is visible in the details. Professional installation equipment includes industrial diamond grinders, oscillating relief saws, and technical pull bars. This tooling allows door jambs to be undercut so the floor flows beneath the wood rather than being cut around it with silicone fillers.
The finished result looks superior and allows the floating system to move freely, preventing joint fatigue. A jamb undercut with a fine-toothed saw at the correct height, for instance, lets a plank slide invisibly beneath the casing with its full expansion clearance intact — a detail a homeowner rarely notices consciously, but one that shows up immediately as a visible gap filled with caulk when it was skipped.
How Much of the Installed Price Actually Goes to Labor?
Labor is a smaller share of the installed price than most homeowners assume, which is part of why cutting corners on it saves relatively little. Our installation labor for laminate is $2.25 per square foot, and $2 for LVP — the rest of an installed price covers material, underlayment, vapor barrier, and disposal of old flooring. Every line item is listed in our published prices.
A homeowner comparing a bare “installation only” quote against a full professional quote is not comparing the same scope of work. The cheaper number typically excludes material, moisture testing, and the leveling and vapor-barrier steps that determine whether the floor survives its first humid season.
Home Value and Aesthetic Longevity
A poorly installed floor with creaks, hollow spots, and visible gaps is a liability when selling a home. Today’s buyers recognize the “springy” feel of an unlevel subfloor as a sign of future trouble. A professionally engineered floor feels solid, sounds silent, and maintains its “just-installed” appearance for decades.
The professional path increases resale value and marketability. A home inspection that flags creaking or gapping flooring becomes a negotiating point that can cost a seller more than the original installation would have, and a buyer’s inspector checking for hollow spots is looking for exactly the subfloor problems that skipped preparation leaves behind.
Peace of Mind — The Ultimate Return
The practical value of professional installation is the elimination of ongoing stress about the floor itself. A floor engineered correctly the first time does not lift when the heater runs in January or develop snapping joints during a summer storm. That reliability is what separates an installation treated as an expense — paid once and worried about for years — from one treated as an investment that quietly does its job for decades.
What Does “Expense” vs. “Investment” Look Like Over 10 Years?
Six checkpoints separate the two paths, and each one compounds into the next over a decade of ownership. The table below lines up preparation steps, warranty status, and total cost side by side.
| Step | Low-cost / DIY path | Professional installation |
|---|---|---|
| Moisture testing | Often skipped | CM or RH reading before material orders |
| Subfloor leveling | Rarely verified | Checked against planimetry tolerance |
| Vapor barrier | Frequently omitted or unsealed | Continuous, SD-rated, seams taped |
| Manufacturer warranty | Often voided by undocumented prep | Preserved with documented compliance |
| Likely outcome at year 3–5 | Peaking, gapping, or replacement | Flat, silent, still under warranty |
| Total cost if failure occurs | Original cost + full replacement | Original cost only |
Planning a flooring project in Tampa Bay? Every quote starts with a moisture reading of the slab, at no cost. Get your free photo estimate or call (813) 455-5756.
Frequently asked questions
What should a professional flooring price in Tampa Bay include?
High-quality laminate material, technical underlayment, and professional labor including subfloor moisture testing and preparation. Quotes significantly below a full-scope professional price usually omit the engineering steps required for a floor to last through Florida's humidity swings, even when the visible plank quality looks similar.
Will professional installation really make a floor last longer?
Yes. A professionally installed floor on a level, dry slab with a proper vapor barrier can last 20 to 25 years under normal Tampa Bay conditions. A DIY installation over an unlevel slab or without a vapor barrier often fails within 2 to 5 years, requiring a full replacement.
Can money be saved by doing the demolition as a homeowner?
Yes, many homeowners handle the demo phase themselves to reduce overall project cost. The prep phase that follows — leveling, grinding, and moisture testing — should still be handled by professionals to ensure the foundation meets the engineering standards a manufacturer warranty requires.
Does professional installation come with a labor warranty separate from the manufacturer's?
Typically yes. Manufacturer warranties cover the product itself — defects in the plank — while a separate installer workmanship warranty covers labor errors like an unlevel subfloor or missing expansion gaps. Both matter, because a manufacturer warranty claim is denied if the failure traces back to installation, not the product.
What documentation should professional installation provide?
A dated moisture reading of the slab, the vapor barrier's SD rating, and confirmation that expansion gaps and underlayment specifications meet manufacturer requirements. This documentation is what a manufacturer requests if a warranty claim is filed, and its absence is the most common reason claims are denied.

US standard for measuring relative humidity inside a concrete slab using in-situ probes drilled to 40% of slab depth, read after 72 hours of equilibration.
US standard for measuring moisture vapor emission from a concrete slab using anhydrous calcium chloride, expressed in pounds per 1,000 sq ft per 24 hours.
US standard practice for preparing concrete floors to receive resilient flooring. Covers flatness, cleanliness, and moisture condition before installation.
The building code in force across Florida, including moisture and structural requirements that apply to slab-on-grade residential construction.
European deep-core moisture test that reacts a slab sample with calcium carbide and reads the resulting gas pressure. Supporting knowledge: the applicable US standards are ASTM F2170 and F1869.
Supporting knowledge — not the standard we work toGerman standard series for floor screeds, source of the widely cited 2.0% CM cement and 0.5% CM anhydrite thresholds. Supporting knowledge, not the applicable US standard.
Supporting knowledge — not the standard we work toHigh-Density Fiberboard: the compressed wood-fiber core of most laminate planks. It absorbs water vapor and swells irreversibly, which is why slab moisture matters.
Stone Plastic Composite: rigid vinyl core made of limestone powder and PVC. Dimensionally stable under humidity swings and unaffected by water.
Wood Plastic Composite: vinyl core with wood flour and foaming agents. Softer and warmer underfoot than SPC, and less dimensionally stable.
Luxury Vinyl Plank: multi-layer vinyl flooring in plank format. Fully waterproof as a material, though the subfloor beneath still governs installation.
Abrasion Class rating for laminate wear resistance, from AC1 to AC6. AC4 suits normal residential use; AC5 handles heavy traffic and light commercial.
A sheet layer placed between slab and flooring to block ground moisture vapor. Required over slab-on-grade construction regardless of surface dryness.
Foundation type where the concrete slab sits directly on the ground, dominant in Florida residential construction. Ground moisture migrates upward continuously.
The permitted deviation of a subfloor across a given span. The common benchmark is 3/16 inch over 10 feet; beyond that, deviation transfers into the locking joints.
A pourable cement-based compound that flows to a level surface, used to correct slab deviation. Needs 24 to 72 hours of cure before flooring goes down.
The 8 to 10 mm clearance left between a floating floor and every fixed vertical surface, absorbing seasonal expansion. Bridging it transfers stress to the joints.
Conditioning flooring material inside the room where it will be installed, 48 to 72 hours before installation, so it reaches interior temperature and humidity.
An angle-in locking profile that joins planks without adhesive. The insertion angle is specified by the manufacturer; forcing it deforms the profile permanently.
The raised ridge that forms along plank edges when a floating floor expands without room to move. In Florida the usual causes are slab moisture or a bridged expansion gap.