
How Does Professional Laminate Flooring Installation Work in Tampa Bay?
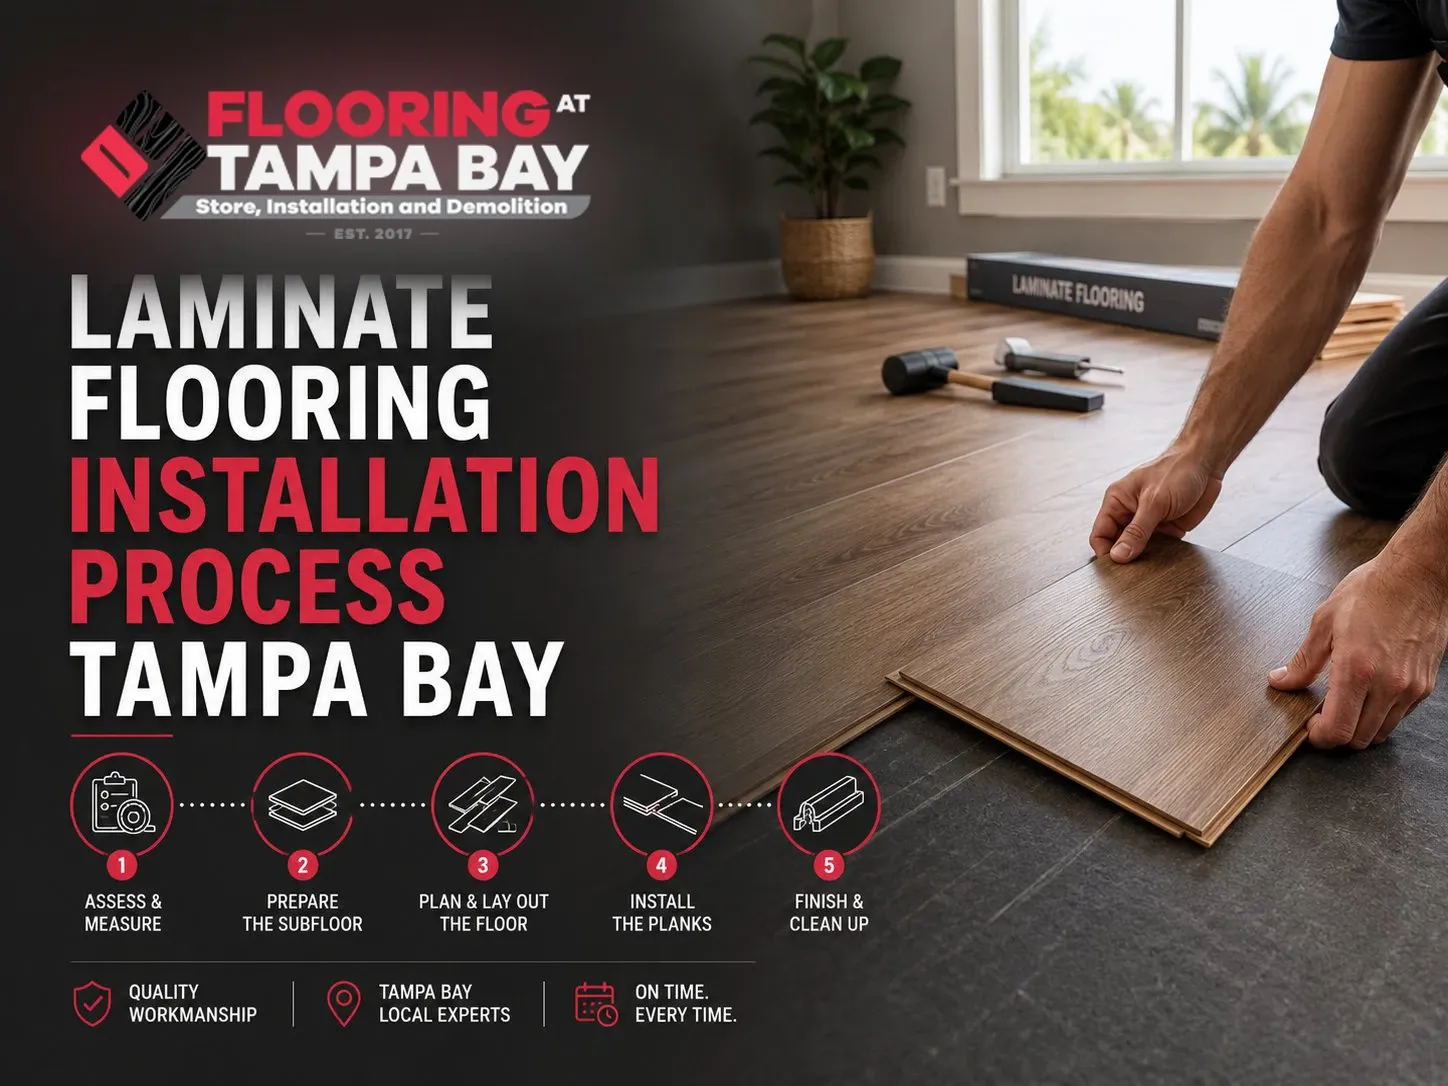
Professional laminate installation in Tampa Bay runs in three stages: an on-site assessment that measures the slab and defines scope, a preparation stage that corrects moisture and flatness, and the installation itself. The middle stage decides whether the floor survives Florida humidity — and it is the stage most often skipped.
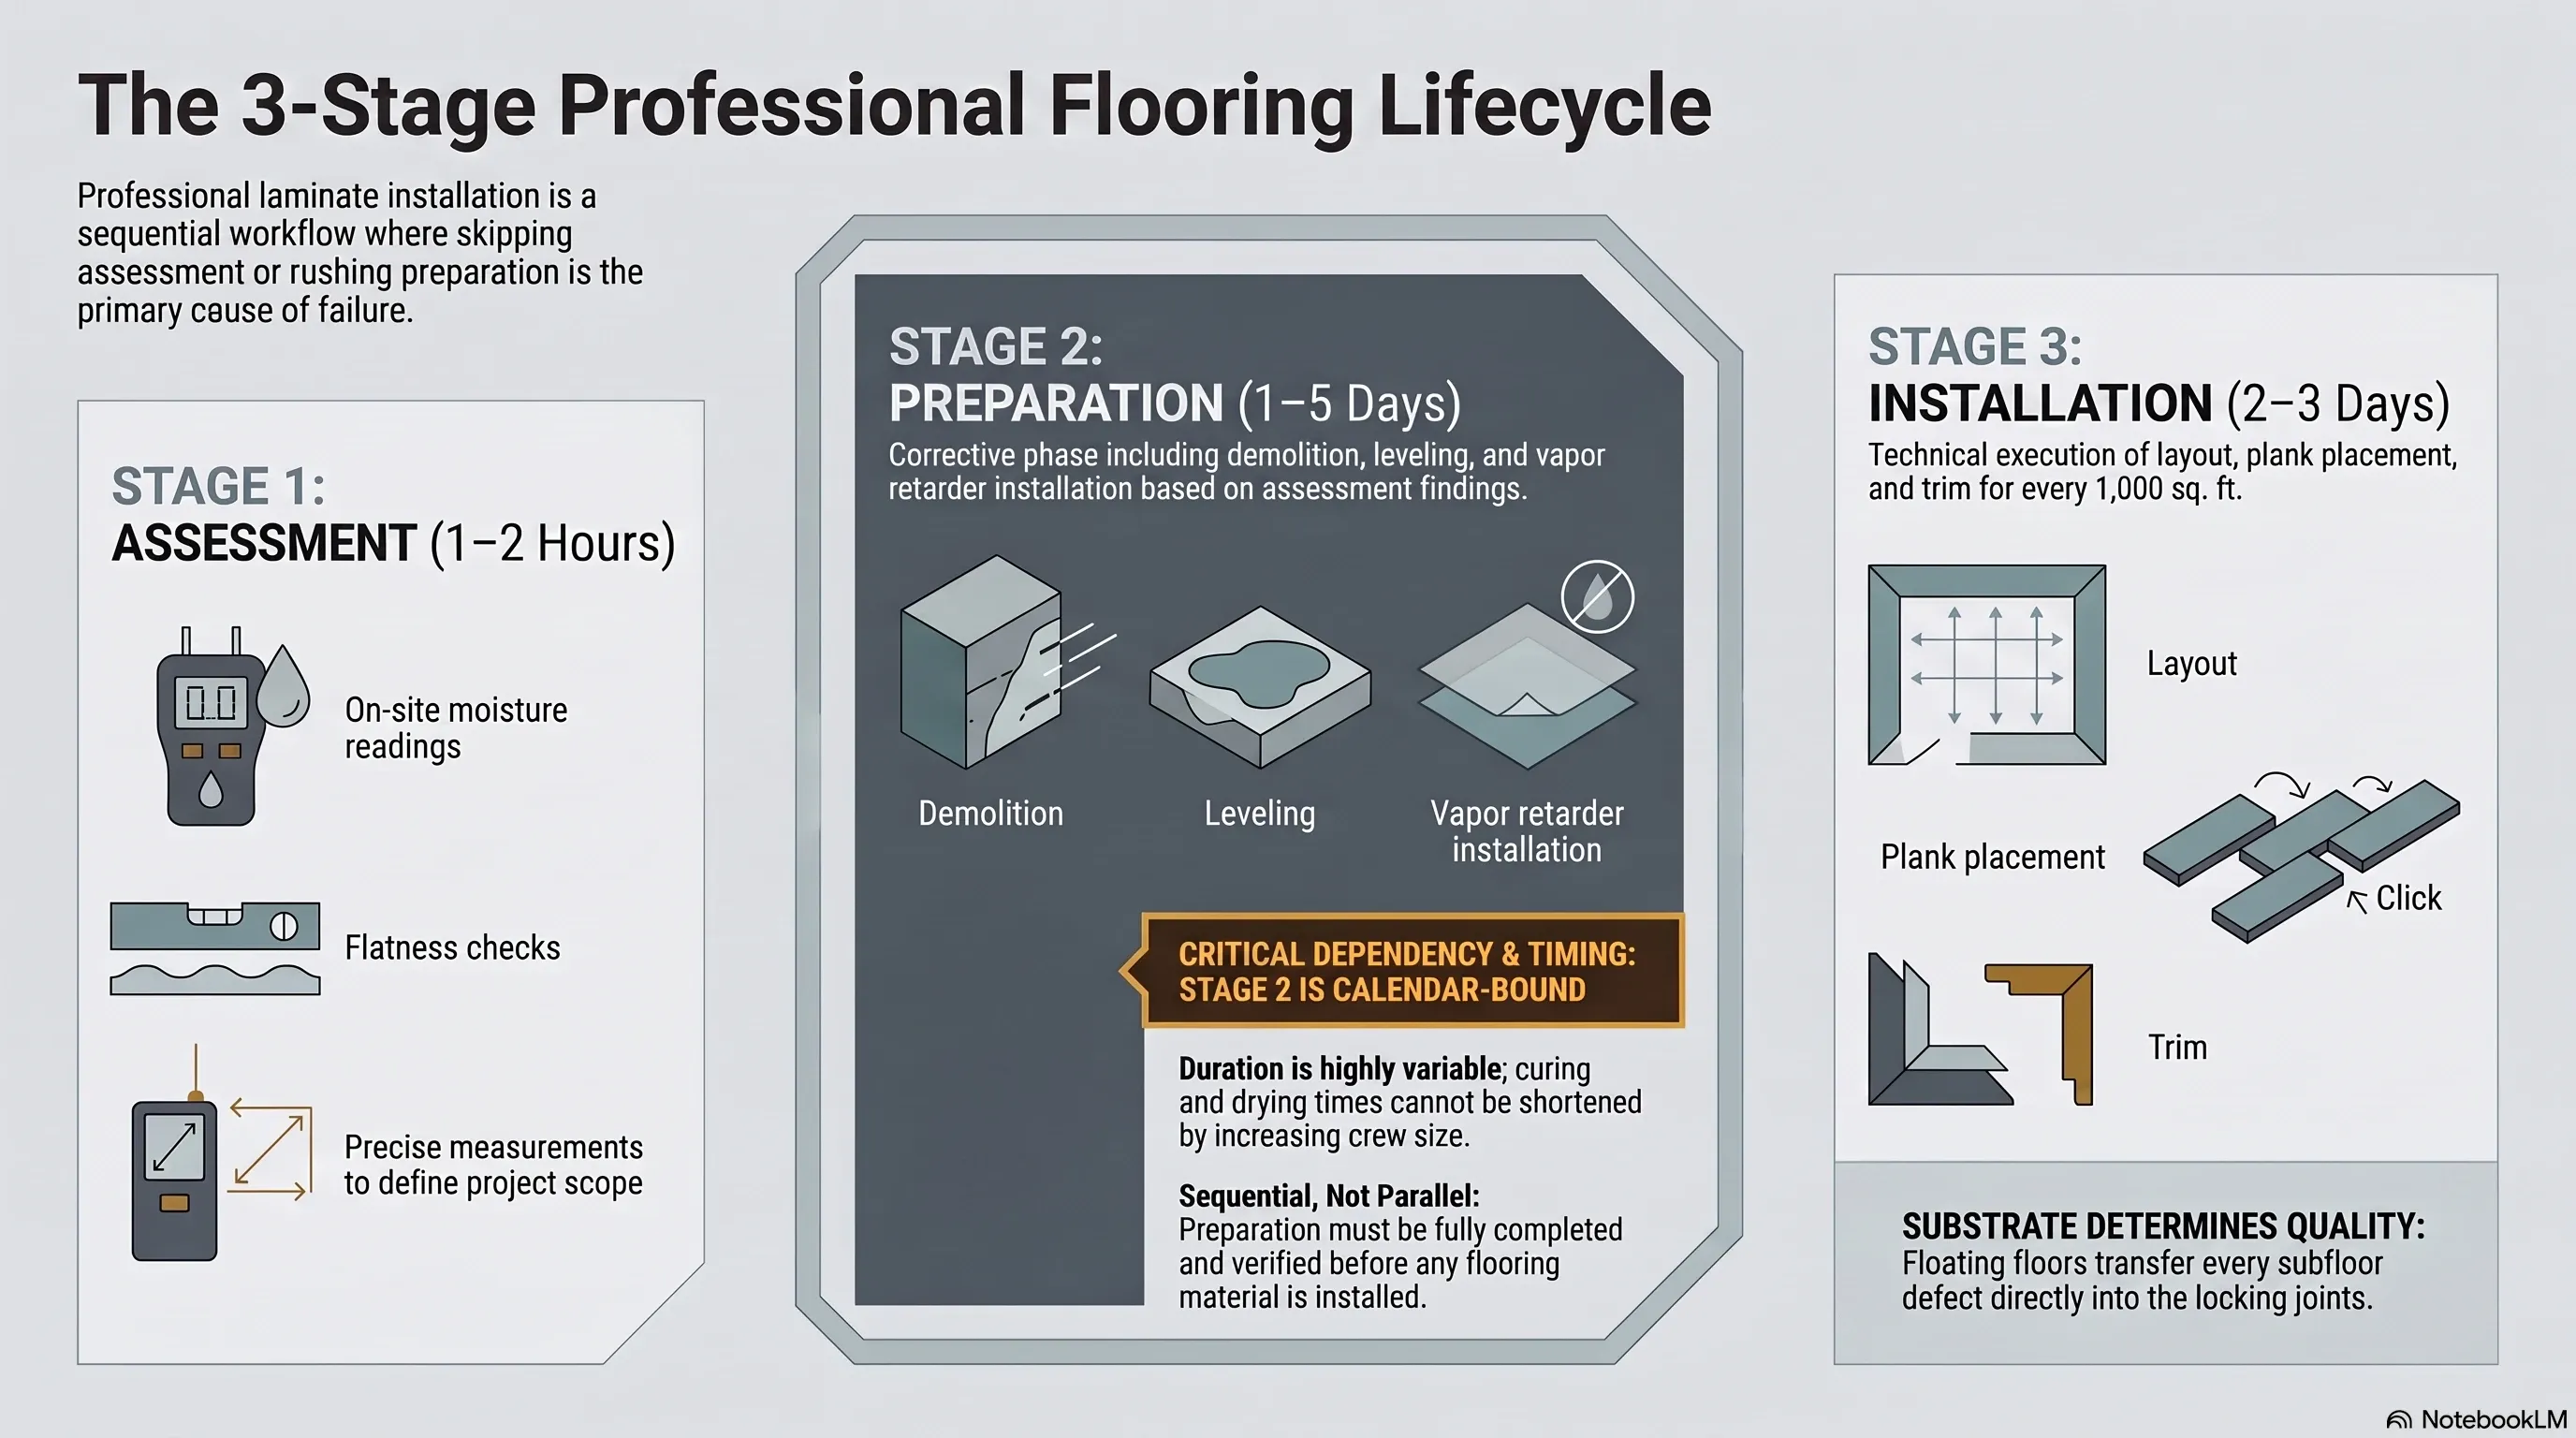
What are the three stages of a flooring installation project?
Every flooring project separates into assessment, preparation, and installation. Assessment establishes what the slab actually is: moisture content, flatness deviation, and existing floor covering. Preparation corrects what the assessment found. Installation places the planks. Compressing three stages into one visit is where most residential flooring failures begin.
The stages are sequential, not parallel. A slab that reads above threshold cannot be corrected on the same day the planks arrive, because drying and curing take calendar time that no crew size shortens.
| Stage | What happens | Typical duration |
|---|---|---|
| Assessment | Moisture reading, flatness check, measurement, material selection | 1 to 2 hours on site |
| Preparation | Demolition, debris removal, leveling, vapor retarder | 1 to 5 days, depending on findings |
| Installation | Layout, plank placement, transitions, trim | 2 to 3 days per 1,000 sq ft |
Why does the subfloor determine the entire installation?
The subfloor sets the ceiling on installation quality, because a floating floor transfers every defect beneath it into the locking joints above. A slab with 1/4 inch of deviation over 10 feet produces joints that flex with every footstep. The planks are not the failure point — the substrate under them is.
Two slab conditions get measured before anything else. Moisture content determines whether installation can proceed at all, and the concrete moisture testing methods used to establish it read the core of the slab rather than its surface. Flatness determines how much correction the slab needs, and the limits of subfloor correction define when leveling stops being viable.
Slab-on-grade construction dominates residential building across Hillsborough and Pasco counties. That construction method places the concrete in permanent contact with ground moisture, which migrates upward by capillary action regardless of interior conditions. A vapor retarder beneath the underlayment is not optional in this construction type.
How is the layout planned before the first plank goes down?
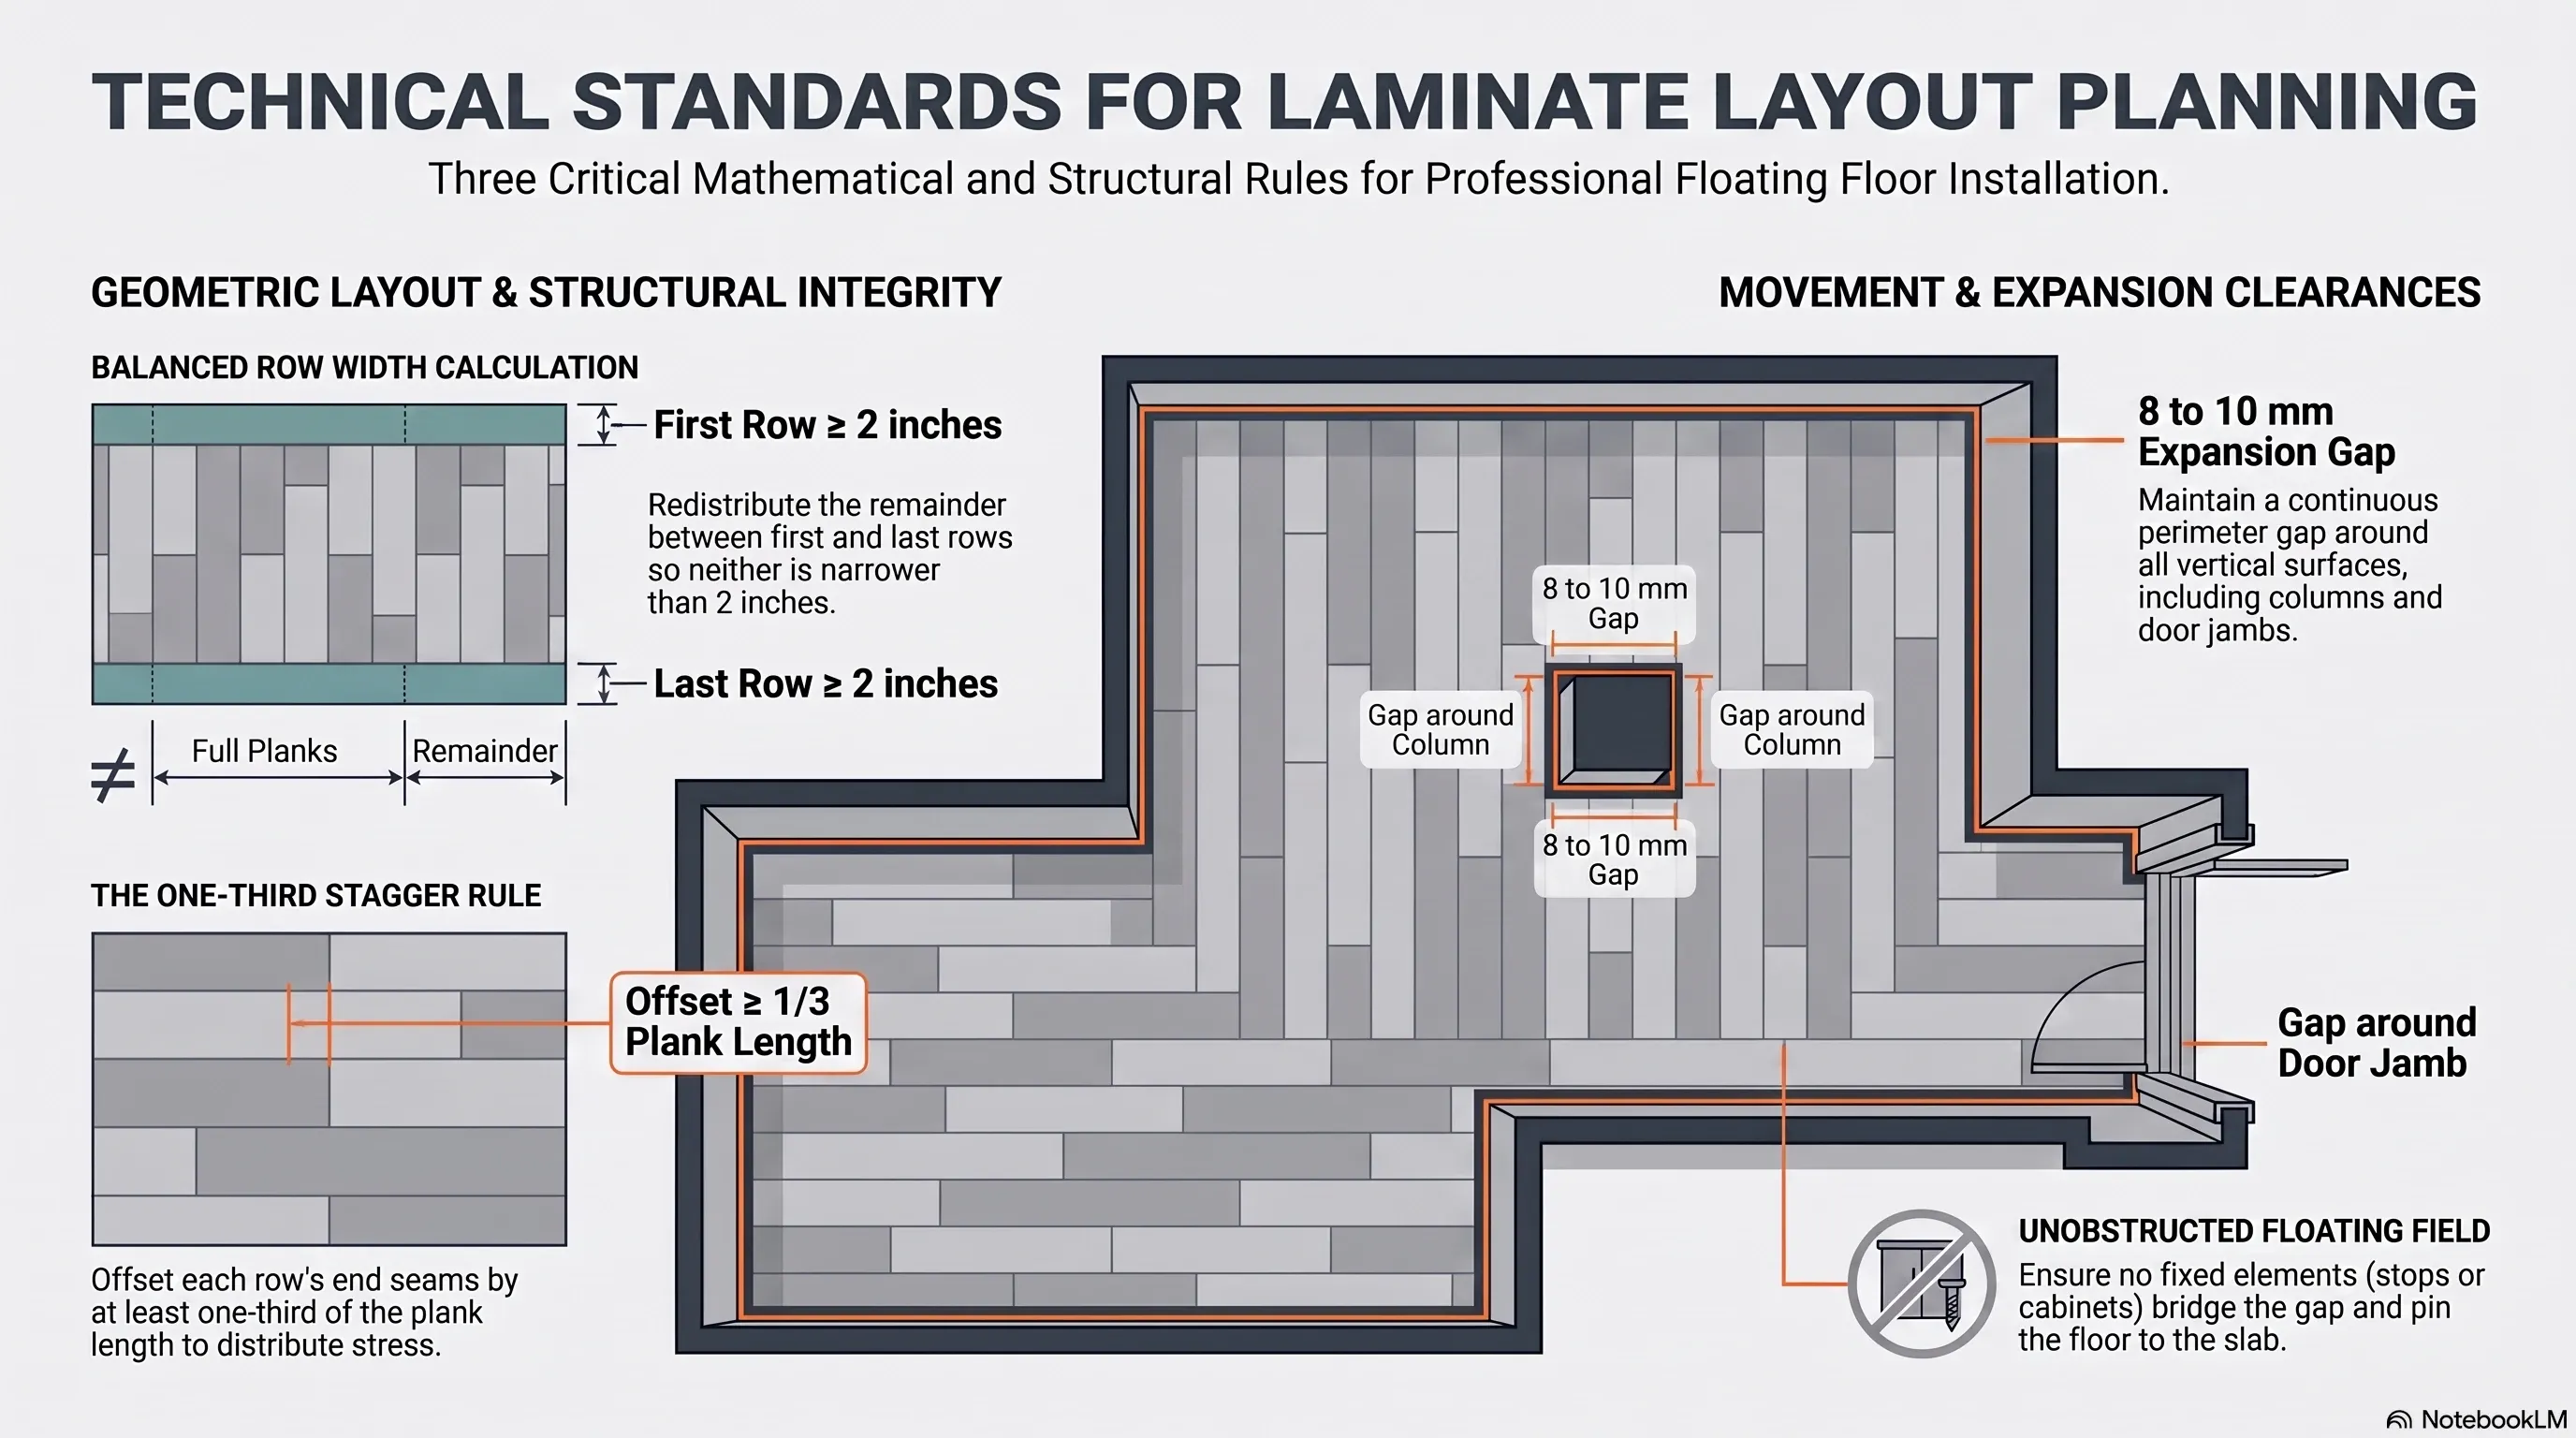
Layout planning calculates row width and plank direction before any material is cut. The calculation prevents the two most visible defects in a finished floor: a final row narrower than 2 inches, and a seam pattern that repeats in a visible rhythm across the room.
Row calculation divides room width by plank width and redistributes the remainder across the first and last rows. That redistribution is why geometric layout planning happens on paper before installation, not by adjustment halfway across the floor.
Seam placement follows the one-third staggering rule, which offsets each row by at least one third of plank length. The rule serves structure before appearance: aligned seams concentrate stress along a single line across the floor field.
What expansion clearance does Florida humidity require?
Laminate expands and contracts with ambient humidity, and the perimeter gap absorbs that movement. Manufacturers specify 8 to 10 mm around every fixed vertical surface. Tampa Bay’s average relative humidity near 74 percent, combined with air conditioning cycling that drops interior humidity sharply, produces a wider annual movement range than most of the continental United States.
Continuous runs have limits. Beyond roughly 12 meters in either direction, accumulated movement exceeds what a perimeter gap absorbs, and dimensioning expansion joints becomes structural rather than cosmetic. Open-plan Florida homes reach that limit routinely.
The gap fails when it is bridged. Any element fixed through the floating floor into the slab — a door stop, a heavy cabinet run, a threshold screwed down — converts the field into two fields and transfers stress to the locking joints between them.
How are transitions and obstacles handled?
Transitions and penetrations are cut to preserve the expansion gap, not to hide it. A door jamb is undercut horizontally so the plank slides beneath the casing, which maintains clearance while removing the visible gap line. Cutting the plank around the jamb instead produces a visible notch and eliminates the clearance.
Pipes and columns follow the same principle. The cut leaves clearance around the penetration and covers it with a collar that rests on the plank rather than fixing to the slab, a technique detailed in maneuvering around pipes.
Where laminate meets tile, carpet, or a different plank height, a transition profile spans the joint. The profile anchors to the substrate on one side only, which is what allows the floating field to keep moving.
What separates professional installation from a self-installed floor?
Three factors separate the two: slab measurement before any material arrives, tools that seat the locking joint without damaging it, and correction of the substrate rather than concealment. The plank-laying itself is the least technical part of the process, and the part a careful homeowner handles perfectly well.
- Measurement. Moisture and flatness readings taken before purchase, not after delivery.
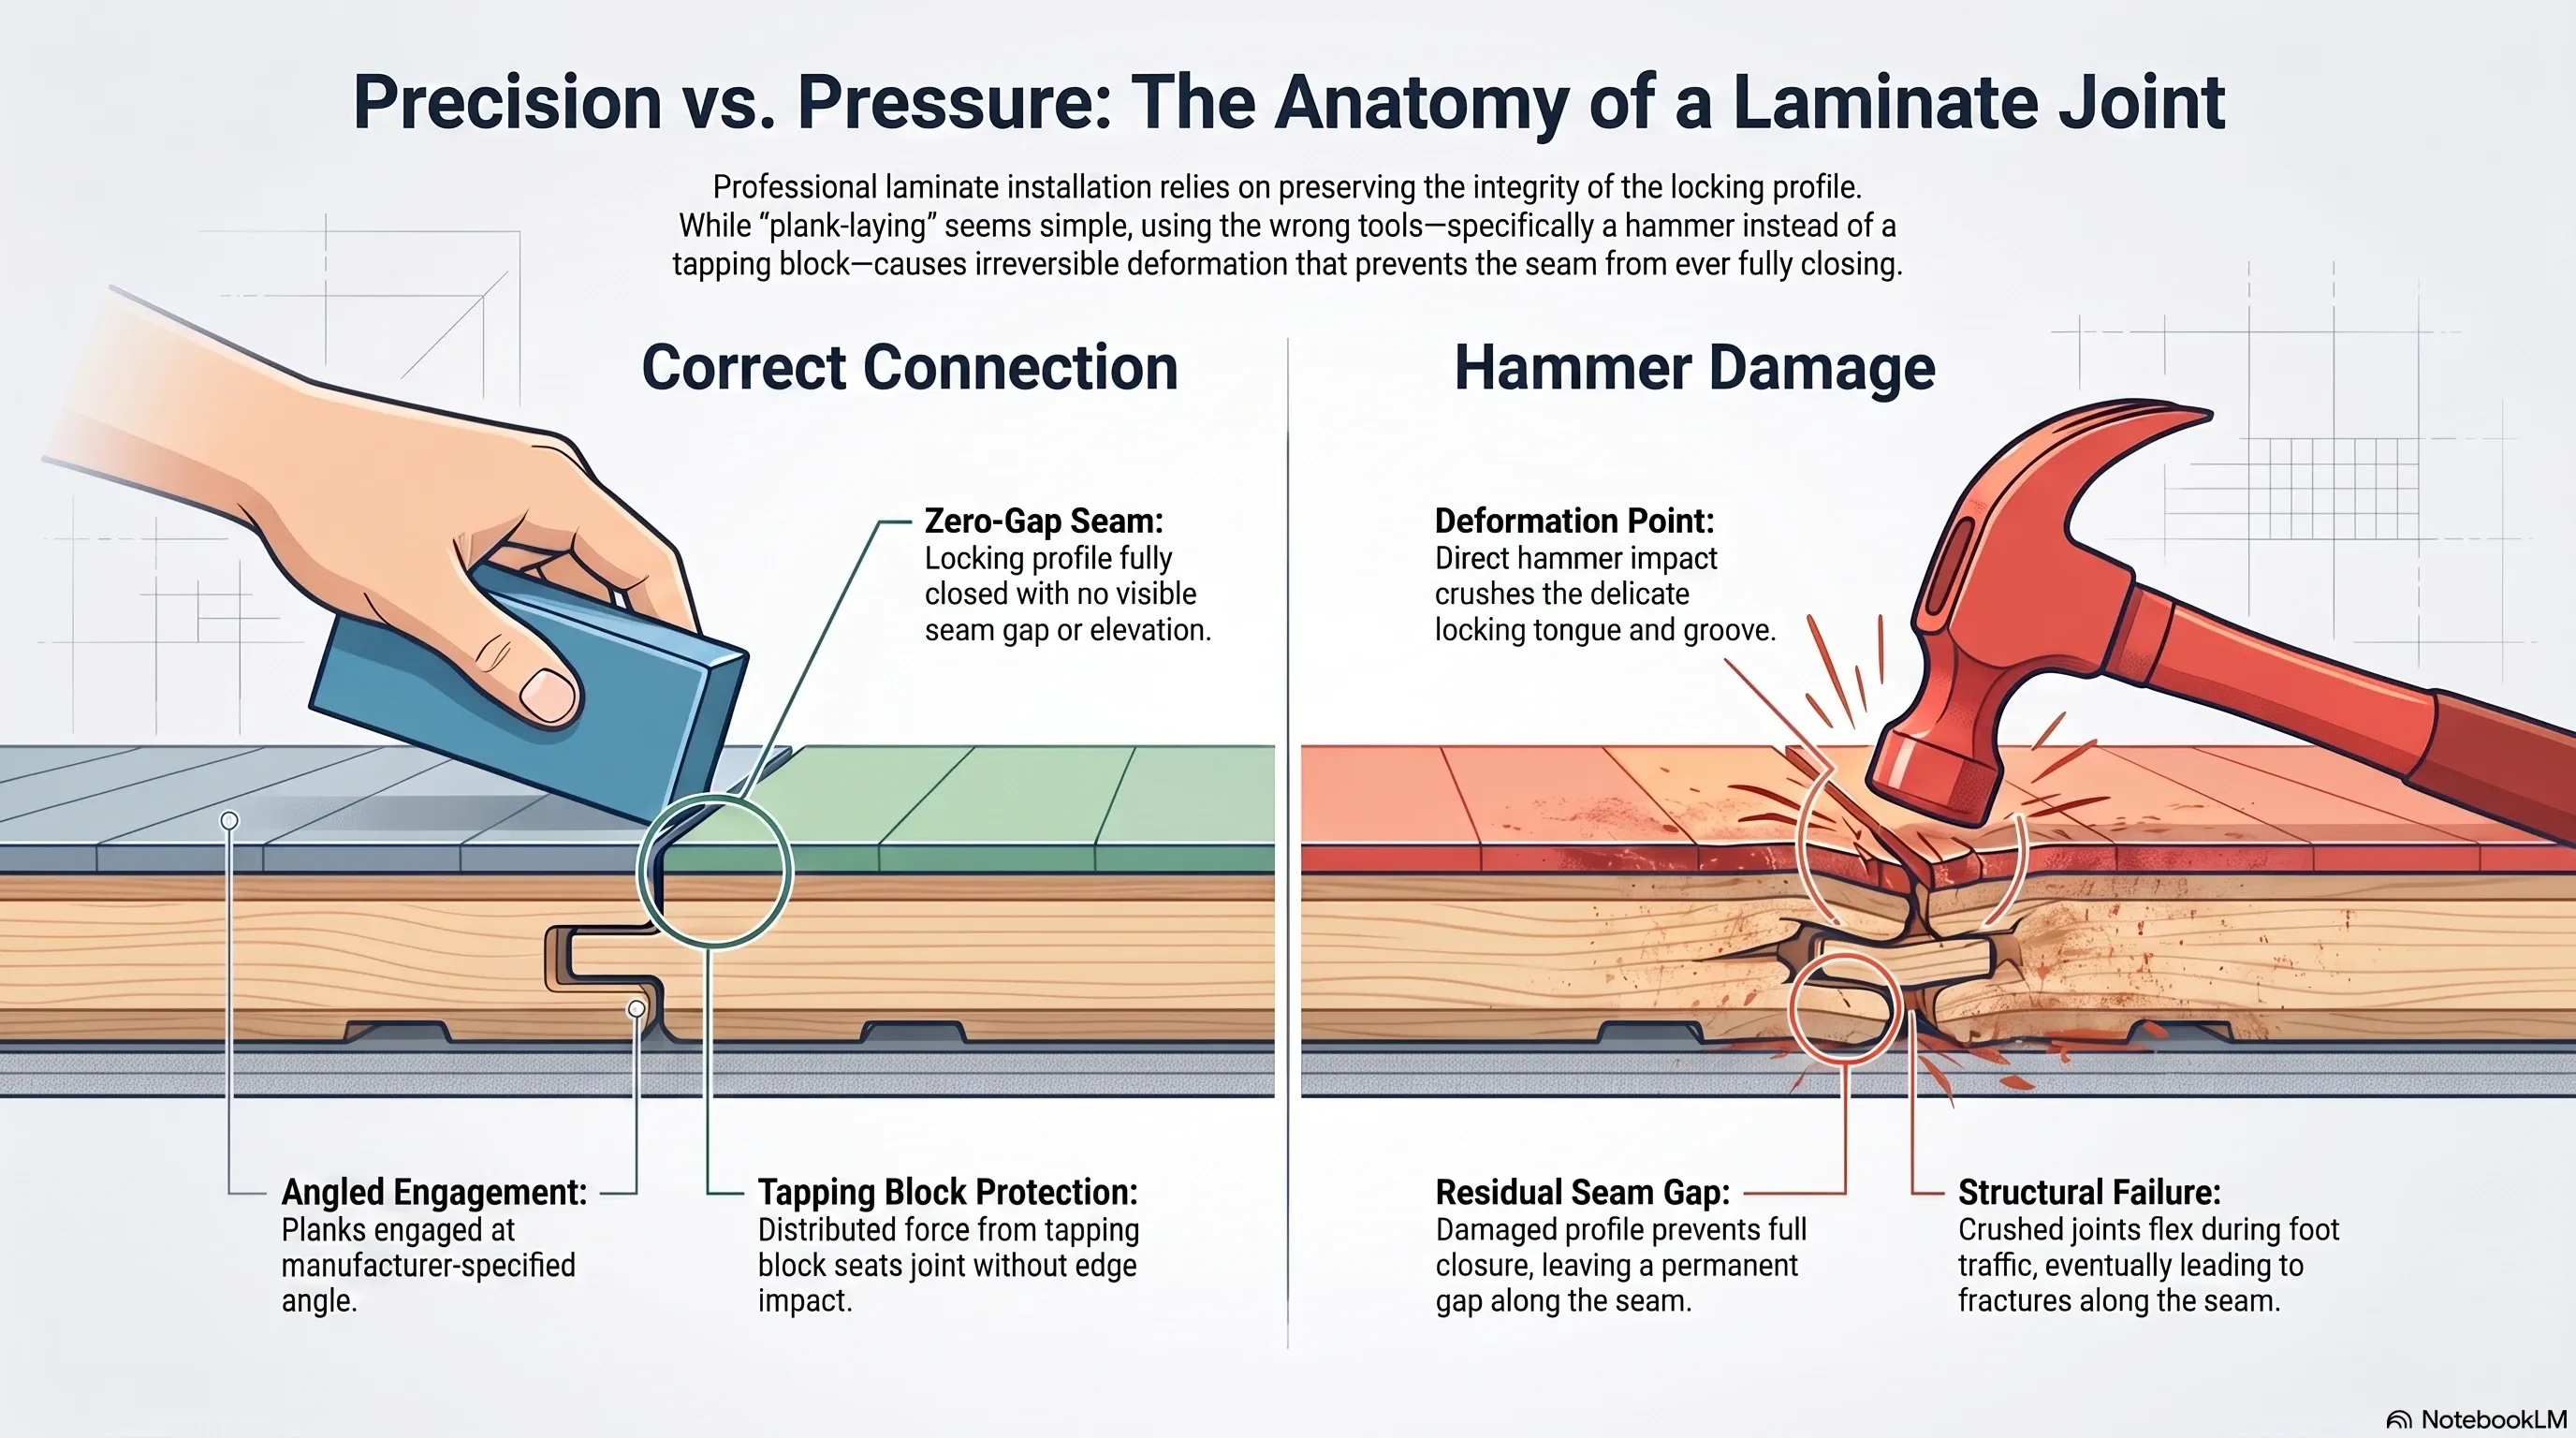
- Joint engagement. Pull bars and tapping blocks seat the joint at the angle the locking system requires. A hammer against a plank edge deforms the profile and the seam never fully closes.
- Acclimation. Material conditioned in the installation room for 48 to 72 hours, following acclimatization requirements rather than installed from a truck the same morning.
- Cut quality. Clean cutting technique preserves the locking profile on cut planks, which carry the same structural load as full planks.
As of 2026, laminate and luxury vinyl plank remain the dominant residential choices across the Tampa Bay area, and both are floating systems governed by the same clearance and substrate rules described here.
What does installation cost in the Tampa Bay market?
The installed price of laminate flooring combines material and installation labor. Our installation labor for laminate is $2.25 per square foot, and that figure covers plank installation on a slab already prepared. Preparation is quoted separately because its scope depends entirely on what the assessment finds. Every line item is listed in our published prices.
The variables that move the number are substrate condition, removal of existing flooring, and layout complexity. A herringbone or diagonal pattern increases labor and waste factor against a standard straight lay, which is why herringbone installation is quoted as a distinct scope.
Planning a flooring project in Tampa Bay? Every quote starts with a moisture reading of the slab, at no cost. Get your free photo estimate or call (813) 455-5756.
Frequently asked questions
How long does laminate flooring installation take in a Tampa Bay home?
A 1,000 square foot single-level installation runs two to three working days once the slab is ready. Slab preparation adds time separately: a self-leveling pour needs 24 to 72 hours of cure before planks go down, and a slab that fails a moisture test can add weeks.
Does laminate flooring need to acclimate before installation in Florida?
Yes. Laminate needs 48 to 72 hours inside the conditioned room where it will be installed, boxes flat and unopened. In Tampa Bay, planks stored in a garage or truck absorb ambient humidity well above interior conditions and expand after installation.
What expansion gap does laminate flooring require in Tampa Bay?
Most manufacturers specify a 8 to 10 mm perimeter gap, and Florida's humidity swings make the upper end the safer choice. The gap runs around every wall, column, and door jamb, and stays uncovered by anything fixed to the floor.
Can laminate be installed directly over a concrete slab in Florida?
Only after the slab passes a moisture test and meets flatness tolerance. Slab-on-grade construction across Hillsborough County transmits ground vapor continuously, so a vapor retarder is required beneath the underlayment regardless of how dry the surface feels or how long the house has stood.
What flatness tolerance does a slab need before laminate installation?
The common industry benchmark is 3/16 inch of deviation over a 10 foot span, measured with a straightedge. Deviation beyond that transfers into the locking joints, which flex with every step and eventually fracture along the seam, well before the planks themselves show any wear.
Keep reading

How to Measure Concrete Moisture with the Calcium Carbide (CM) Method Before Flooring Installation

Horizontal Undercutting of Door Jambs: Why It Prevents Laminate Floor Failure

How the Uniclic System Works: The 20-Degree Angle and Tapping Rule for Laminate Installation
US standard for measuring relative humidity inside a concrete slab using in-situ probes drilled to 40% of slab depth, read after 72 hours of equilibration.
US standard for measuring moisture vapor emission from a concrete slab using anhydrous calcium chloride, expressed in pounds per 1,000 sq ft per 24 hours.
US standard practice for preparing concrete floors to receive resilient flooring. Covers flatness, cleanliness, and moisture condition before installation.
The building code in force across Florida, including moisture and structural requirements that apply to slab-on-grade residential construction.
European deep-core moisture test that reacts a slab sample with calcium carbide and reads the resulting gas pressure. Supporting knowledge: the applicable US standards are ASTM F2170 and F1869.
Supporting knowledge — not the standard we work toGerman standard series for floor screeds, source of the widely cited 2.0% CM cement and 0.5% CM anhydrite thresholds. Supporting knowledge, not the applicable US standard.
Supporting knowledge — not the standard we work toHigh-Density Fiberboard: the compressed wood-fiber core of most laminate planks. It absorbs water vapor and swells irreversibly, which is why slab moisture matters.
Stone Plastic Composite: rigid vinyl core made of limestone powder and PVC. Dimensionally stable under humidity swings and unaffected by water.
Wood Plastic Composite: vinyl core with wood flour and foaming agents. Softer and warmer underfoot than SPC, and less dimensionally stable.
Luxury Vinyl Plank: multi-layer vinyl flooring in plank format. Fully waterproof as a material, though the subfloor beneath still governs installation.
Abrasion Class rating for laminate wear resistance, from AC1 to AC6. AC4 suits normal residential use; AC5 handles heavy traffic and light commercial.
A sheet layer placed between slab and flooring to block ground moisture vapor. Required over slab-on-grade construction regardless of surface dryness.
Foundation type where the concrete slab sits directly on the ground, dominant in Florida residential construction. Ground moisture migrates upward continuously.
The permitted deviation of a subfloor across a given span. The common benchmark is 3/16 inch over 10 feet; beyond that, deviation transfers into the locking joints.
A pourable cement-based compound that flows to a level surface, used to correct slab deviation. Needs 24 to 72 hours of cure before flooring goes down.
The 8 to 10 mm clearance left between a floating floor and every fixed vertical surface, absorbing seasonal expansion. Bridging it transfers stress to the joints.
Conditioning flooring material inside the room where it will be installed, 48 to 72 hours before installation, so it reaches interior temperature and humidity.
An angle-in locking profile that joins planks without adhesive. The insertion angle is specified by the manufacturer; forcing it deforms the profile permanently.
The raised ridge that forms along plank edges when a floating floor expands without room to move. In Florida the usual causes are slab moisture or a bridged expansion gap.